Everything You Need To Know To Clean Your Firearms
- Posted on
- By Jenna Poirier
- 0
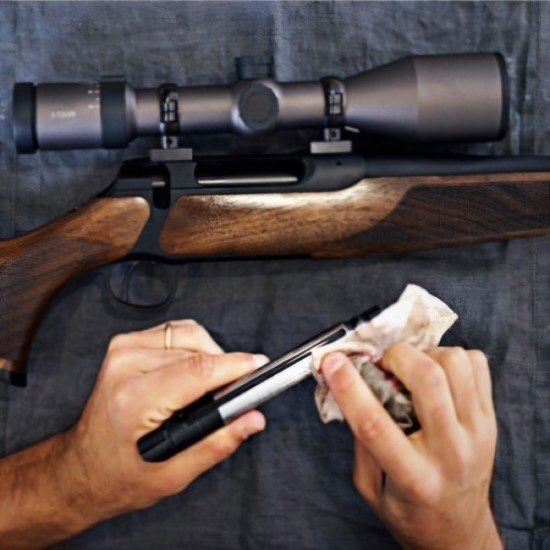
Everything you need to know to clean your firearm; from the types of tools and benefits and negatives of their variations to a step by step on how to clean your fiream.
Why Should You Clean Your Barrel On A Regular Basis?
At some point, accuracy begins to degrade, and to regain top performance you’ve got to clean all that fouling out. Just how many rounds you can fire before degradation occurs depends on the quality of your rifle’s bore. Very smooth bores with minimal machining and tool marks usually can be shot far more times before accuracy begins to drop off.
Two types of fouling build up in rifling. The least detrimental to accuracy and the easiest to clean out is carbon fouling. It’s the soot-type residue left by the burning gunpowder. The other type is copper fouling. It’s copper residue that’s basically smeared off the bullet into the pores and microfractures of the steel barrel. Typically, the faster the velocity of your cartridge/bullet combination, the faster fouling builds up (both carbon and copper) and the heavier it builds.
Tools
Cleaning Rod
There are 3 piece and 1 piece cleaning rods, typically they are coated in a non abrasive finish to prevent the sides of the cleaning rod from wearing on the rifling. We suggest using a one piece rod. Although 3 piece rods are more compact making storage easier, the joints in the 3 piece rod tend to collect dirt that can scratch the bore as it passes through. They are also often more fragile and then tend to flex more compared to 1 piece rods. Rods are caliber specific, make sure you are using the right size rod for your firearm.
Bore Snake
Bore snakes are fantastic for quick cleaning or to remove any debris that may be in the barrel. They do not replace the need to do a proper cleaning but they are a great tool to use in between cleanings. Bore snakes are caliber specific, make sure you are using the right size bore snake for your firearm.
Brushes
Brushes are attached to a rod, they are primarily used to loosen and remove debris, fouling, and residue from the barrel. They are typically used in conjunction with cleaning patches and solvents to ensure a thorough and effective cleaning process. Bushes are caliber specific, make sure you are using the right size brush for your firearm.
Brass Brushes: offer a more abrasive cleaning action and are better suited for heavier fouling and when scrubbing. May react with some solvents and give a false bluing.
Nylon Brushes: offer a gentler cleaning action Ideal for use with cleaning solvents that might react with brass and they prevent false bluing. Good for regular cleaning and lighter fouling.
Jags
Jags are attached to a rod, firmly grip the patch, ensuring it doesn't slip off while cleaning. The pointed tip keeps the patch aligned within the barrel, preventing uneven cleaning and potential damage. Jags are caliber specific, make sure you are using the right size jag for your firearm.
Brass Jags: The most common type, offering a good balance of strength, durability, and safety.
Nickel-Plated Jags: Can be more prone to scratching the barrel than brass jags but prevent false bluing.
Mops
Mops are attached to a rod, are used to apply cleaning solutions and lubricants into the barrel and chamber. They are also used to remove excess cleaning solution and dry the bore after the cleaning process. Mops are caliber specific, make sure you are using the right size mop for your firearm.
Patches
Patches are attached to the jag. Patches are used to wipe down the barrel and remove debris, cleaning solvents, and residue. They are typically made of cotton and come in various sizes to accommodate different calibers.
Solvents
Solvents in rifle cleaning are used to dissolve and remove residue like powder buildup, copper fouling, and carbon from the barrel. These solvents break down these materials, making them easier to remove with patches and brushes. Common solvents include ammonia-based solutions for copper and carbon, as well as specialized solvents for specific types of fouling.
Oils
Oil serves several key purposes: lubrication, protection, and cleaning. It helps to lubricate moving parts like the bolt and action, preventing wear and tear and ensuring smooth operation. Additionally, oil provides a protective layer against rust and corrosion, especially in humid environments. Finally, some oils, like Kroil, can be used to clean the bore by giving the steel a non-stick surface.
How To Do A Quick Clean With A Bore Snake
Simply apply a couple drops of solvent to the bristles, before cleaning your firearm with a boresnake. Thread the shoelace end through the barrel from the breech til it comes out of the end of the barrel. Pull the bore snake from the shoelace end through the barrel and repeat the process a few times until it becomes easier to pull it through.
How To Properly Clean your Rifle
- Completely Unload the Rifle
This is the most crucial step in the entire cleaning process. To ensure the safety of yourself and those around you, you must remove your magazine (if equipped) and any ammunition that may be loaded within the firearm including in internal magazines. Only do this while pointing the firearm in a safe direction. Make sure you do a thorough check, visually (look) and tactilely (feel). Never rely on your firearm’s safety because accidents can and do happen.
2. Cleaning the Rifle
For some semi-automatic rifles you’ll need to perform a partial take-down of the firearm for cleaning purposes, check with the manufacturer’s instruction manual for details. Take care to watch for springs or other small parts and set them inside a cup, can lid or other container to keep them from getting lost.
Using a cleaning tool, such as a utility brush or cleaning swabs, and remove any loose particles that may be found within the action, bolt, receiver, frame and chamber. Heavy fouling can be removed with a light application of cleaner and allowing it to sit for a few minutes prior to brushing. Remove cleaned fouling with a wipe or cloth.
Moving onto the barrel, you’ll want to apply some bore cleaner on a cleaning patch, and use a cleaning rod with a jag and brush through your barrel. A good way to tell how clean your firearm is getting is to monitor the amount of debris or residue that comes off as you swipe your patch through it. If using a brush tip, run it completely through the barrel before reversing to make sure it doesn’t get stuck. Follow up your bore cleaner soaked patch with several dry ones to make sure you’ve left your barrel clean and dry. Swabs are handy here because they can be used to clean hard-to-reach areas and ensure you get your barrel/chamber as clean as possible. For badly fouled barrels and chambers, a heavier duty cleaner can also be used.
- Apply Lubrication Where Necessary
Once you’ve completely cleaned your action, bolt, receiver, and barrel, you’ll want to properly oil/lubricate the moving parts of your firearm. This will depend on the type of firearm you’re cleaning and recommended lubrication per the manufacturer. In most cases, you’ll want to lubricate bearing surfaces (metal-on-metal, bolt lugs, rails, guides).
Do not apply lubricants to the inside of the barrel or chamber except for long-term storage. This can lead to high pressures when shooting and the potential for catastrophic (BOOM) failure. Lubricant on ammunition can lead to misfires or squibs.
One common myth is that more is better when it comes to lubrication of your firearm. You want to adequately lubricate where needed, but too much can lead to excessive residues, which can lead to malfunctions and handling issues (slippery). Lubricating cloths are an excellent tool because they help control the amount of oil/lubrication being used in any given area of your gun.
Look at worn metal areas on bearing surfaces such as your action, and bolt lugs. On a well-used firearm you’ll see bare metal through the finish in some places. That’s not necessarily a problem as it means your firearm is adjusting itself to work more efficiently. Worn areas do require light lubrication.
- Wipe Down All Components
After you’ve cleaned and lubricated your firearm, wipe it down with a clean, dry cloth. This removes residue and oils/moisture from fingerprints that you may have missed in steps two and three. Once you’re done wiping down all components, you can use wax-treated gun cloths to help polish and protect your firearm. A quick wipe and polish of any wooden furniture on your rifle is also a recommendation.
- Reassemble and Check for Any Irregularities
Once everything is cleaned, and wiped down, it’s time to start reassembling your rifle. During this process, you want to carefully inspect each piece as you put it together and make a note of any damage, irregularities, or excessive wear or play (movement). Occasional dents or scratches happen. Other damage not only hurts the value of your firearm but can lead to potential safety concerns. Should you find anything questionable in your inspection, we highly recommend you take it to a local firearms shop or competent gunsmith. They’ll do a closer inspection and advise you on how to move forward to ensure continued safety and reliability.
For long term storage of firearms, you can use this step to apply preservative oils and then utilize a storage system.
Remember to wipe down your hands and work surfaces after firearm cleaning with a cleaning cloth to remove lead and other heavy metal residues.
Comments
Be the first to comment...